Many people have listened to their first turntable only to be disappointed – this is because their turntable setup was done incorrectly. There is simply no way that vinyl will sound as nice as digital without proper turntable setup. Poor setup typically manifests as one or more of the following.
- Tracking errors (the needle skipping about on the record)
- Excessive distortion throughout or at particular parts of the record, especially the inner grooves
- Tonal imbalance (too much treble or bass)
Suffice to say, if you are experiencing any of these problems it is very likely that you will need to review your turntable setup. The process involves setting a number of parameters. The first component of turntable setup involves setting tracking force, VTA and anti-skate. Essentially, this is getting the tonearm setup correctly.
Image by Piano Piano!
The good news is that tonearm setup is not a particularly difficult task and can be done by anyone new to turntables. All it takes is a little patience and understanding. As with all electronics, it is a good idea to read your manual first. If you do not have a manual because you have a vintage turntable then you will probably be able to find one on the Vinyl Engine library.
I recommend doing this component of turntable setup before you set cartridge overhang (adjust the cartridge within the headshell), and then redo this component again once the overhang is set.
Turntable Setup: How to Balance the Tonearm
Before the tonearm setup process begins, ensure you have the cartridge and stylus installed in the headshell. For the most accurate results, the stylus guard should be removed, as this results in a small amount of extra weight at the cartridge end of the tonearm. Beginners might prefer to leave the stylus guard on, as any fumbles could result in the stylus being damaged.
Set your tracking force to zero. The tracking force dial will be at the pivot point of your tonearm.
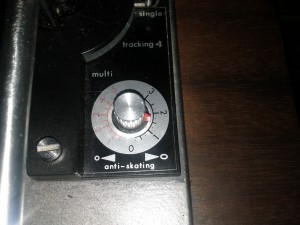
Set your anti-skate to zero. The antiskate dial will be on the flat surface of the turntable somewhere near your tonearm pivot point.
Now comes the slightly difficult part of the tonearm setup. This step is much much easier if the platter of your turntable is removed, so go ahead and do that if you can work out how (be sure to consult your manual)
Remove the tonearm from its resting position and move it out to a position above where the platter was. What you are aiming to do is have the tonearm ‘float’. From a balance perspective, the counterweight at the back end of the tonearm will negate the weight of the cartridge exactly, allowing it to rest at a parallel position without being supported. This takes some time and care. If the cartridge end of the tonearm floats up in the air, move the counterweight towards the cartridge. If the cartridge end of the tonearm sinks down, move the counterweight away from the cartridge.
Turntable Setup: Setting Tracking Force and Anti-Skate
Once you have achieved a level tonearm, you can now go ahead and set the tracking force and anti-skate. Tracking force is dependent on your cartridge. You will need to read the manual for your cartridge or otherwise Google its specifications.
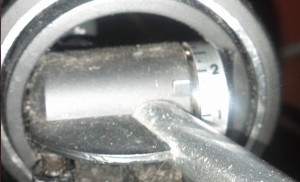
Cartridges will have a recommended range for tracking force, for example, the Ortofon OM-30 Super attached to the Dual 1219 in the pictures has a tracking force of 1.25 to 1.75g. As a starting point, set tracking force to the middle of this range.
Not all tracking force gauges are 100% accurate. The most ideal way to measure tracking force is with the Shure SFG-2 Stylus Tracking Force Gauge. This is one of those pieces of equipment, much like basic cleaning equipment, which is really nice to have as a turntable owner.
If you are completely unable to find information for your cartridge, go ahead and set the tracking force to 2 grams.
Setting anti-skate is slightly turntable dependent. Some turntables have more aggressive anti-skate mechanisms than others. A good rule of thumb is setting the anti-skate to the same as the tracking force.
Both tracking force and anti-skate can be adjusted slightly according to the users ear, so experiment with what you prefer.
Stay tuned for the continuation of the Turntable Setup series – the next instalments will discuss adjusting VTA and setting cartridge overhang.


Leave a Reply