The second part of this series on how to set up a turntable details VTA adjustment. Setting VTA (vertical tracking angle) is yet another factor that must be considered for turntable performance.
For part one in this series, see setting tracking force and anti-skate.
What is VTA?
VTA refers to a specific angle that is pre-set by the company that made the cartridge. It is the angle between the cantilever (the arm that has the stylus at the end of it) and the surface of the record. In the vast majority of cases, this angle is 20 degrees.
However, if we consider that we can modify this angle by raising or lowering the tonearm, we see why VTA adjustment is necessary. By modifying the VTA, we alter where the needle sits within the grooves and by extension, change the sound produced.
It is important to note that not all turntables have the capacity to adjust VTA. If your turntable does not have this capacity, go ahead and skip to the next part in the series of turntable setup.
The Problem With Setting VTA
Although VTA adjustment is important, it is unrealistic to think that the parameters you decide on will stay set in stone.
Vinyl records have an unfortunate habit of being varying thickness or even warping. Playing a warped record might result in the VTA changing every second of playback. If you own any 180 gram vinyl pressings, you will know that they are much thicker than normal pressings.
As setting VTA is about adjusting the height of the tonearm, by having a thicker or raised record we are effectively changing VTA by altering the height at which the stylus comes in contact with the record.
This article explains why when we adjust the height of the tonearm, we are changing an angle called the SRA (stylus rake angle), and that changing VTA is a bit of a myth. This is true, but adjustment of tonearm height has been referred to as VTA adjustment for aeons, and is therefore part of the popular consciousness of turntable owners. Those who prefer correctness might refer to this whole process as setting SRA.
A solution to this is to choose a record for the VTA adjustment process that is average for your collection. If you have some 180 gram vinyl and some thin vinyl, then try and find a medium thickness record. If your collection is made up with primarily one or the other, then select that type of record to set VTA with.
Going About VTA Adjustment
Select an “average shape” (as mentioned above) record that has detailed music, preferably one that contains a good selection of highs and lows. Classical or electronic music is optimal.
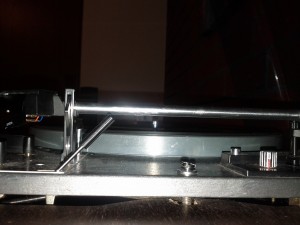
With the record on the platter ant the tonearm resting stationary on the record, use a ruler to measure the height of the tonearm above the record at two separate points. When setting VTA we are aiming for the tonearm to be parallel to the record. Therefore, the height of the tonearm should be equal at both measured points. If the tonearm has a downward slope, then the tonearm must be lowered at the pivot point. Conversely, if the tonearm has an upward slope, it must be raised at the pivot point.
Actually changing the VTA will vary greatly depending on the tonearm used, but generally there will be some sort of dial or screw mechanism that allows the tonearm to be raised up or down and locked in to place. Make sure the tonearm is locked in before you do this.
Fine Tuning VTA
The final part of VTA adjustment is done by the listener’s ears. Lowering the tonearm will generally improve bass, and raising the tonearm will generally improve treble. Experiment with VTA adjustment to find out what works for you.


Leave a Reply